Table of Contents
Android Application Customization manual
At first you should install SkaDate Android application plugin (server) plugin via your Admin Area. Plugin is available for download in your Client Area > Downloads > Mobile Applications section.
To install this plugin:
- Go to Admin area > Plugins > Add new;
- Upload the skandroid.zip (you will have to enter your FTP access details) and click Upload;
- Once the page refreshes - the plugin will get moved from the Available Plugins list to the Installed Plugins.
- Press the Install button.
Before starting the app customization, you will need to:
- create a new Publisher Account at Google Play https://play.google.com/apps/publish/1)
- create images listed at https://hello.skadate.com/docs/faq/site_configuration/app-images#android-application-icons
Android Application customization
1. Download and install Java Development Kit (JDK) appropriate for your operating system:
http://www.oracle.com/technetwork/java/javase/downloads/index.html;
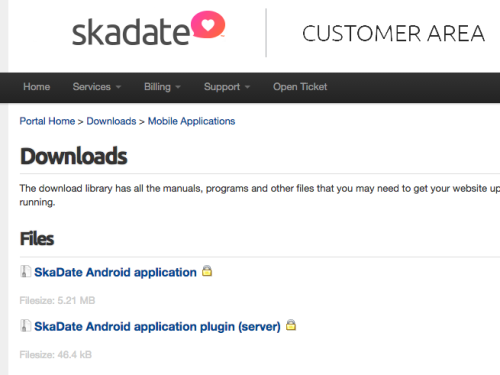
2. Download Android Application source code from Customer Area > Downloads > Mobile applications > SkaDate Android application:
3. Unpack the Android Application archive to your Desktop;
4. app directory will appear, you need to:
- replace the default application icon file (ic.png) with your custom icon2) in the following folders:
- app/src/main/res/drawable;
- app/src/main/res/drawable-mdpi;
- app/src/main/res/drawable-hdpi;
- app/src/main/res/drawable-xhdpi;
- app/src/main/res/drawable-xxhdpi;
- replace the sign-in page background image file (auth_auth_bg.png) with your custom image 3) in the following folders:
- app/src/main/res/drawable-mdpi;
- app/src/main/res/drawable-hdpi;
- app/src/main/res/drawable-xhdpi;
- app/src/main/res/drawable-xxhdpi;
5. Change the app name:
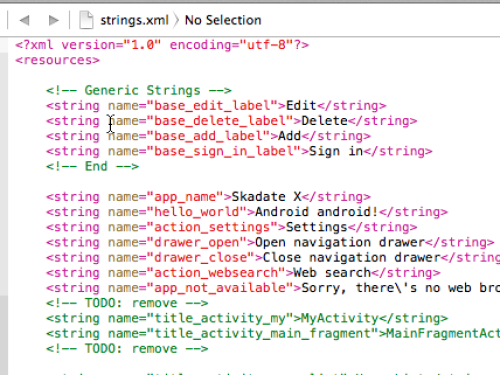
- open app/src/main/res/values/strings.xml file;
- replace Skadate X value with your application name in the following string:
<string name="app_name">Skadate X</string>
6. Change the default Site URL:
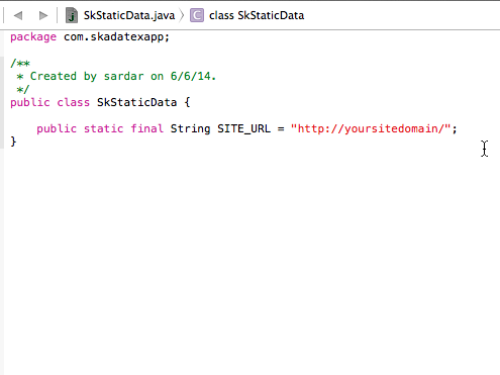
- open the app/src/main/java/com/skadatexapp/SkStaticData.java file;
- replace the null value with your site URL in the following string:
public static final String SITE_URL = null;
The string should look like this one:
__public static final String SITE_URL = "http://my-site.com/";__
7. Download and Install Android Studio (http://developer.android.com/sdk/index.html);
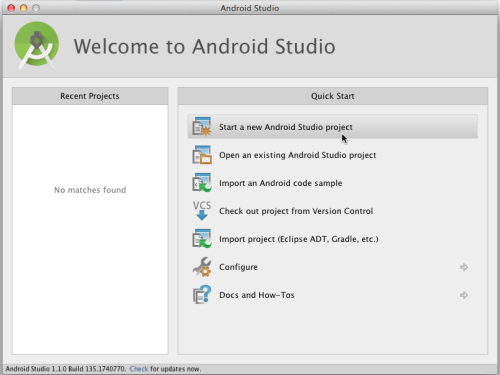
8. Launch Android Studio;
9. Create new Android Studio project:
- click the Start a new Android Studio project button;
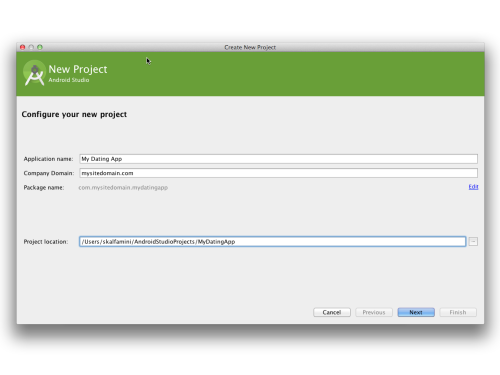
- enter your Application name. For example: My Dating App;
- enter your Company Domain. For example: mysitedomain.com;
- copy the Project location path. This path will be needed in the further steps;
- click Next;
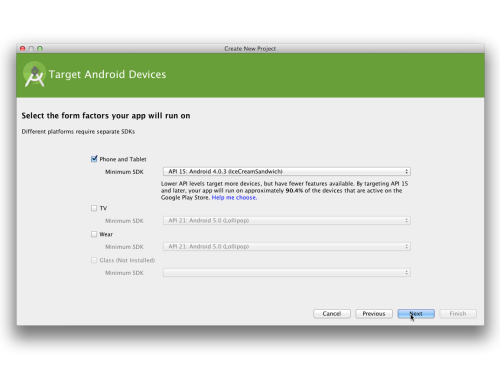
- check the Phone and Tablets box and click Next;
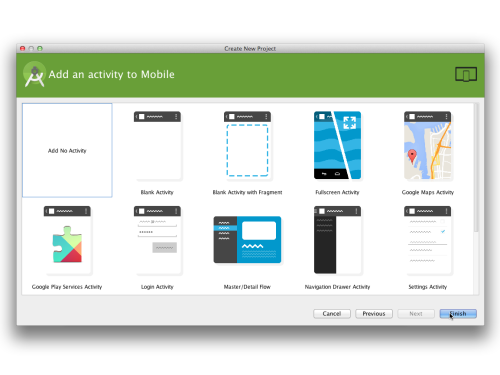
- choose the No Activity option, click Finish.
10. Copy your app folder files located at your Desktop
11. Open the project folder (the Project location path), you will see the app folder.
12. Replace the existing app folder with the copied one from the Desktop and add lib folder as well;
13. Rename the project package name:
- open the Android Studio;
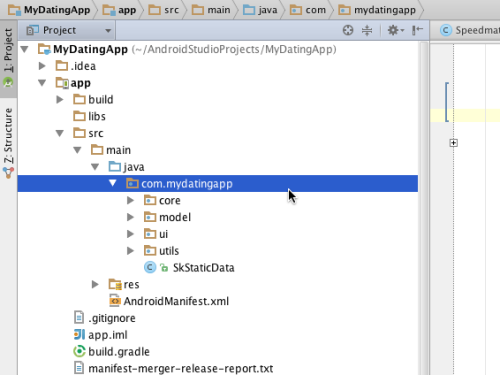
- click the application name in the Navigation bar;
- click the app > java folder;
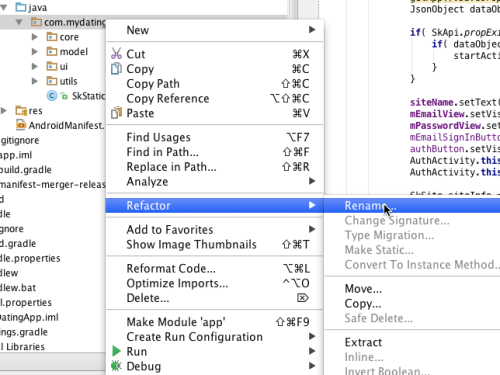
- click the right mouse button at com.skadatexapp, choose the Refactor > Rename option;
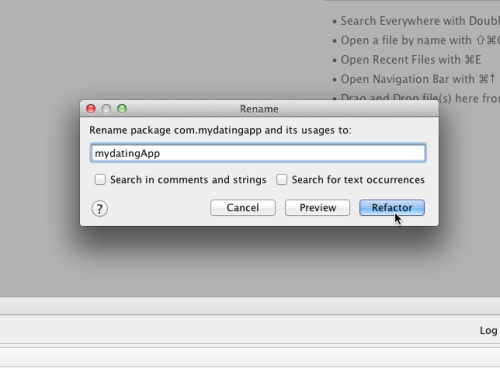
- replace skadatexapp with the custom value. For example: mydatingapp, click Refactor;
- Click Do Refactor in the Find Refactoring Preview menu that appears below:
14. Open the project folder > Griddle Scripts > build.gradle (Module: app) file within Android Studio (double click on it) and replace com.skadatexapp with the your package name. For example: com.mydatingapp;
15. In the same file change versionCode to 1 and change versionName to 1.0
16. Click Sync Now on the upper right corner.
17. Take screenshots:
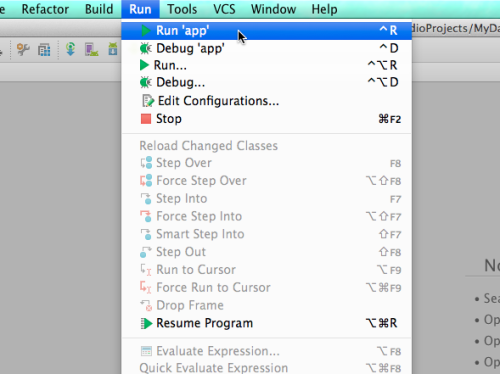
- run the project by clicking the Run → Run 'app' button in the top menu;
- select Launch Emulator option, select android virtual device and click Ok;
- take screenshots;
18. Translate application
In case you want to translate your application to another language, please follow these steps:
- Open your project in Android Studio
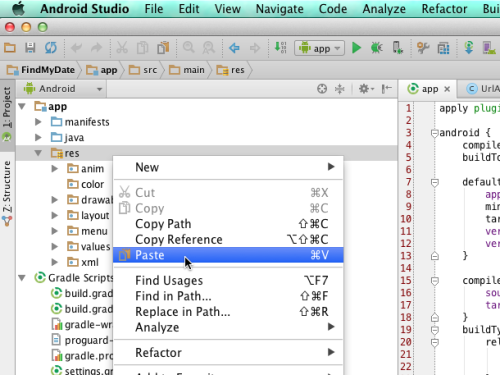
- Go to app > res folder
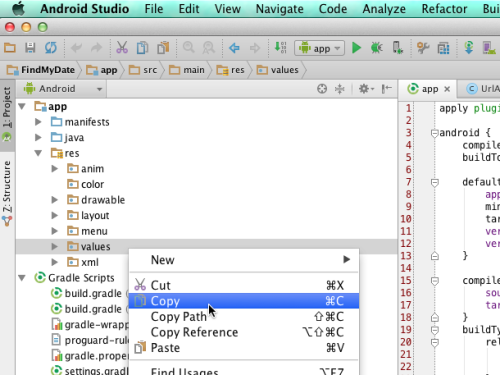
- Copy the values folder
- Click the right mouse button at the res folder
- Select Paste
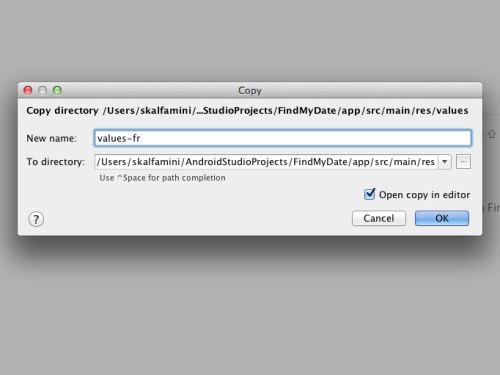
- Rename the folder by adding ISO code of your language4).
For example: values-ru
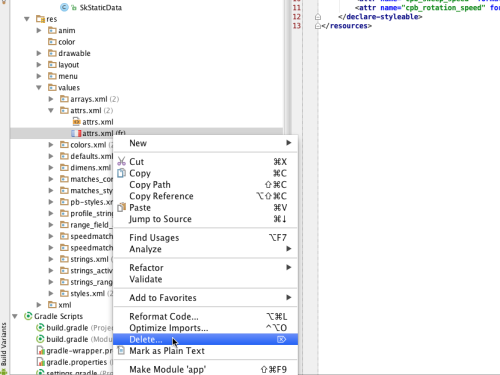
- Remove the custom app > res > values > attrs.xml file
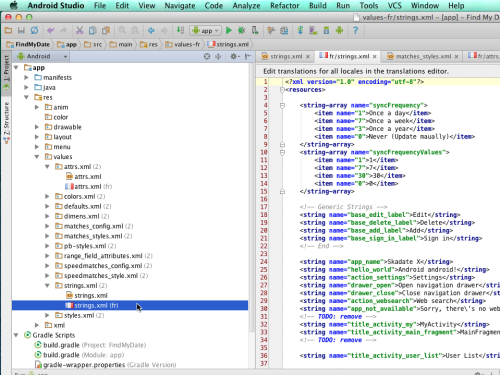
- Go to app > res > values strings.xml file
- You will see the newly created file for custom language.
- Translate the values.
19. If you want to sell membership plans or credit packages via application, you need to connect your app with the in-app products settings by adding the special key into the app code.
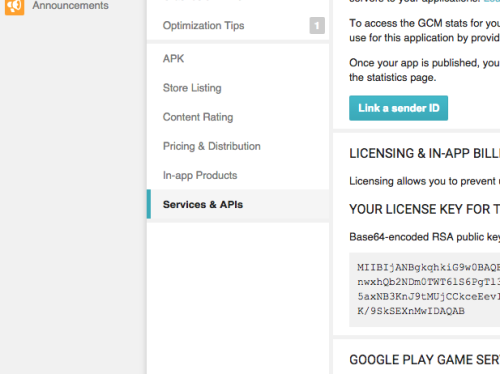
- Login to your Google Developer Console: https://play.google.com/apps/publish/
- Select the app you need to configure in-app products for
- Click the Services & APIs tab in the sidebar
- Find the LICENSING & IN-APP BILLING section
- Copy the license key value (Base64-encoded RSA public key) 5);
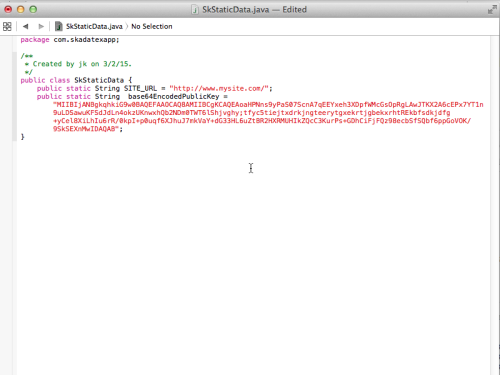
- open the app/src/main/java/com/skadatexapp/SkStaticData.java file;
- enter the key for the public static String base64EncodedPublicKey config.
- Go to your site Admin Area > Plugins > Installed plugins > Skadate Android > Settings > General > Billing Settings, check the Billing Enabled box and enter the same LICENSE KEY to Public field.
20. Build Android application .apk file:
- open Android Studio;
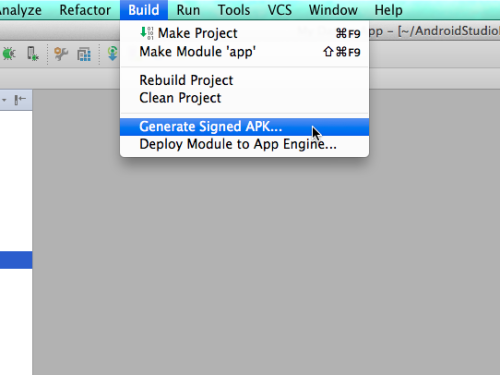
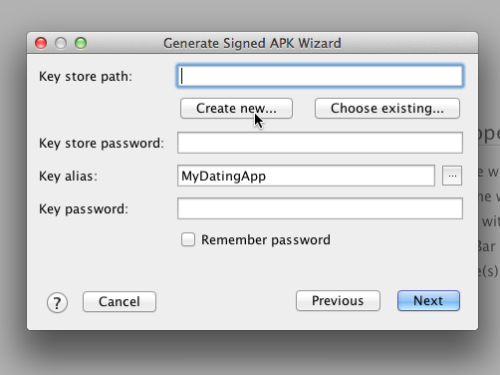
- click the Build → Genereate Signed APK… in the top menu;
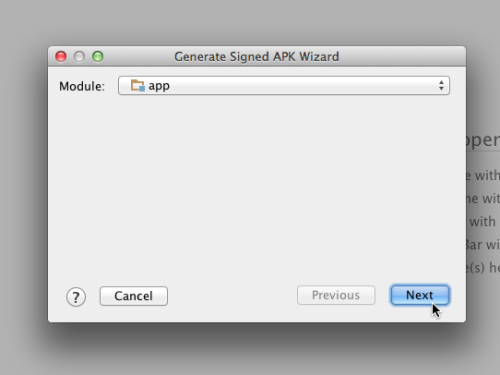
- select app module, click Next;
- enter the Key store path:
- click the Create new button;
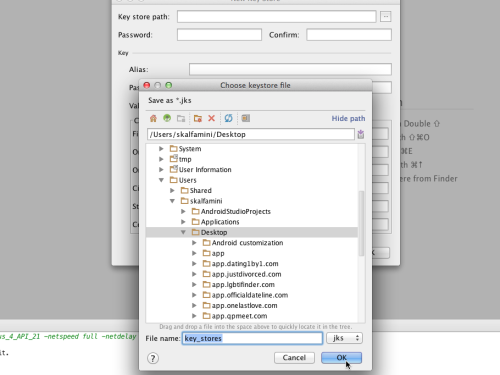
- click the Browse for the key store path field (3 dots);
- select the Desktop folder;
- enter the file name. For example: key_store;
- click Ok.
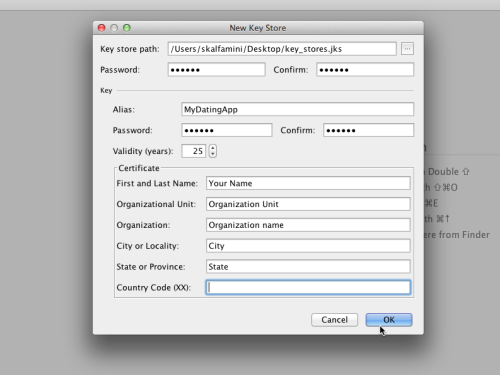
- enter Password (any value);
- enter Alias. For example: MyDatingApp;
- enter Password. You can use the same password as above;
- fill in the rest of fields with your private information and click Ok;
| Note: Please do not lose your Key store file, alias name and password, otherwise you will have to customize your application and go through all the process once again. It would be better if you save this information anywhere on your computer. |
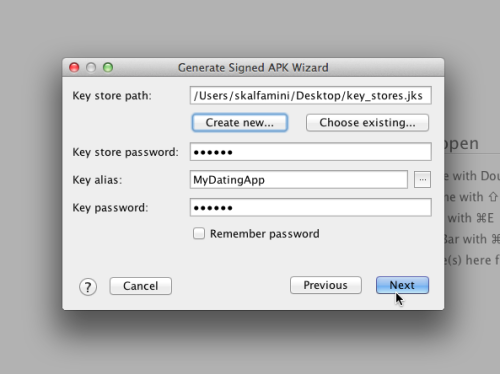
- After you saved all information, click the Next button;
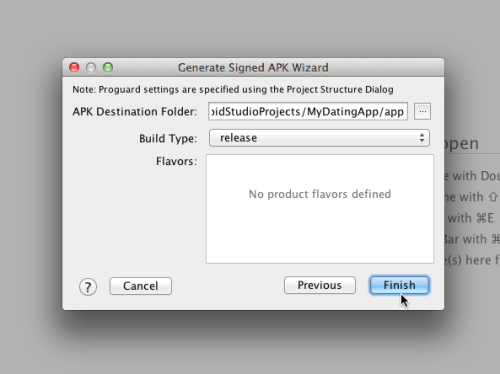
- select release value for the Build Type and click Finish;
Once the .apk file is created, you will receive the 'Signed APK's generated successfully' message, click the button to open the folder that contains the .apk file.
The app-release.apk file is ready to submit to the Google Play.
| Note:If the Facebook connect plugin is active and configured on your site, you have to follow these steps to configure it for your Android app. |
Push Notifications Configuration:
Please follow this manual to set up Push Notices: https://hello.skadate.com/docs/manuals/push_notifications_android
Facebook Connect configuration:
If you are using our generic App ( https://play.google.com/store/apps/details?id=com.skadatexapp&hl=e) then to get working FB Connect you need to:
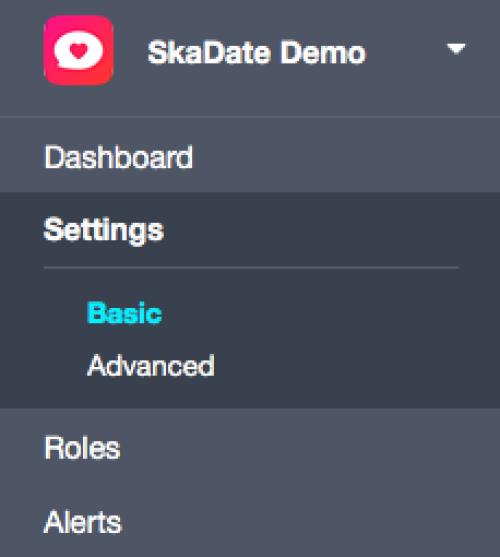
1. Go to Facebook > Facebook connect application Settings > Basic.
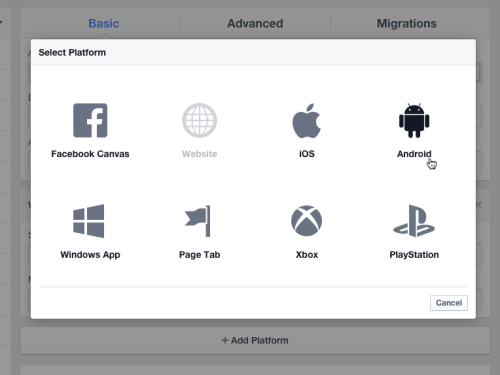
2. Click the Add Platform button.
3. Choose the Android option;
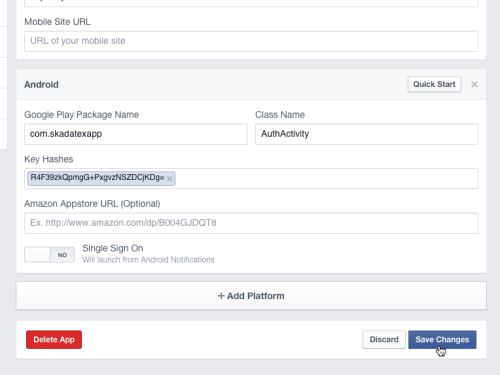
- enter Google Play Package Name. Value should be: com.skadatexapp;
- enter AuthActivity value into the Class Name field;
- Key Hashes: R4F39zkQpmgG+PxgvzNSZDCjKDg=
- Click Save Changes.
If you are using your custom application, then to get working FB Connect you need to:
1. Go to Facebook > Facebook connect application Settings.
2. Click the Add Platform button.
3. Choose the Android option;
- enter Google Play Package Name. For example: com.mydatingapp;
- enter AuthActivity value into the Class Name field;
- Key Hashes:
- Open the console on your computer.
- Run one of the following command:
keytool -exportcert -alias <RELEASE_KEY_ALIAS> -keystore <RELEASE_KEY_PATH> | openssl sha1 -binary | openssl base64
Replace the following values:
<RELEASE_KEY_ALIAS> - the alias value you've entered while building the .apk file. For example: MyDatingApp
<RELEASE_KEY_PATH> - the path where the key store file is located. For example: /home/Desktop/key_store.jks
| Note: Enter the password you've generated while the build the .apk file. |
- Copy generated hash. It should look like: BlBGSZMr61Zra3plocXRRhw6kjw=
- Enter the copied hash into the Key Hashes field. Save changes.
Android Application In-app Billing:
If you started to configure the in-app products settings by following the instruction in step 19, after you submit your application to the Store, you need to complete the configuration by following the instructions described here.
Submitting customized application to Google Play
Follow this 7-steps wiki to submit your application to Google Play: http://www.wikihow.com/Submit-an-App-to-the-Android-Market
https://support.google.com/googleplay/android-developer/answer/113469?hl=en
Video tutorial: http://support.brightcove.com/en/app-cloud/docs/step-step-guide-publishing-android-market-windows
| Note: Do not forget to check the Content guidelines and US export laws in the Pricing & Distribution section during the submission process. |
For Store listing the following information is required:
1. Google Play publisher account access details. If you do not have an account please create one.
Google Play registration fee is $25.
2. Your application title – how would you like your application to be named on the store. (30 characters)
3. Your application short description - short information about your application (80 characters)
4. Your application full description - full information about your application and services you are providing for your site members. (up to 4000 characters)
5. Contact Email and Contact Phone number.
6. Application icons files in sizes described here: https://hello.skadate.com/docs/faq/site_configuration/app-images#android-application-icons

