Table of Contents
Android Application In-app Billing Configuration Guide
Configure project in Google API Console
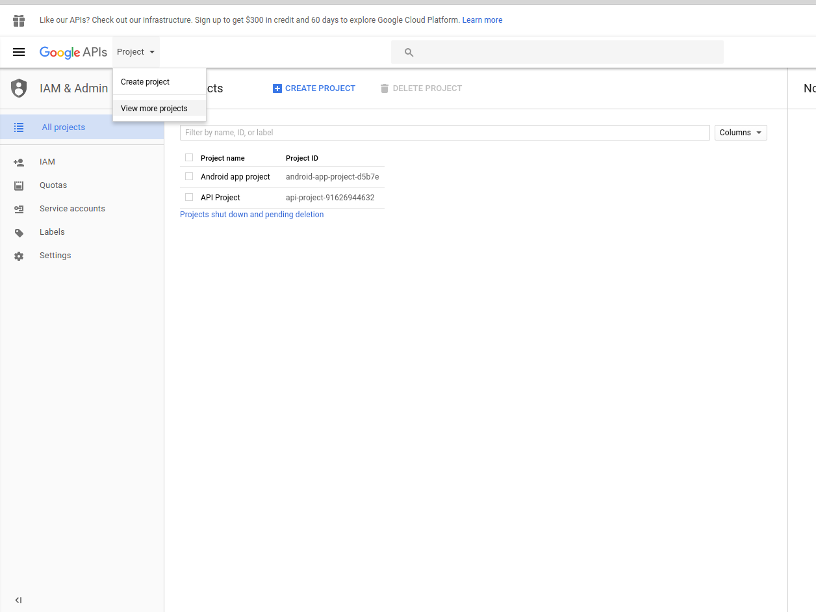
1. Login to Google API Console: https://console.developers.google.com.
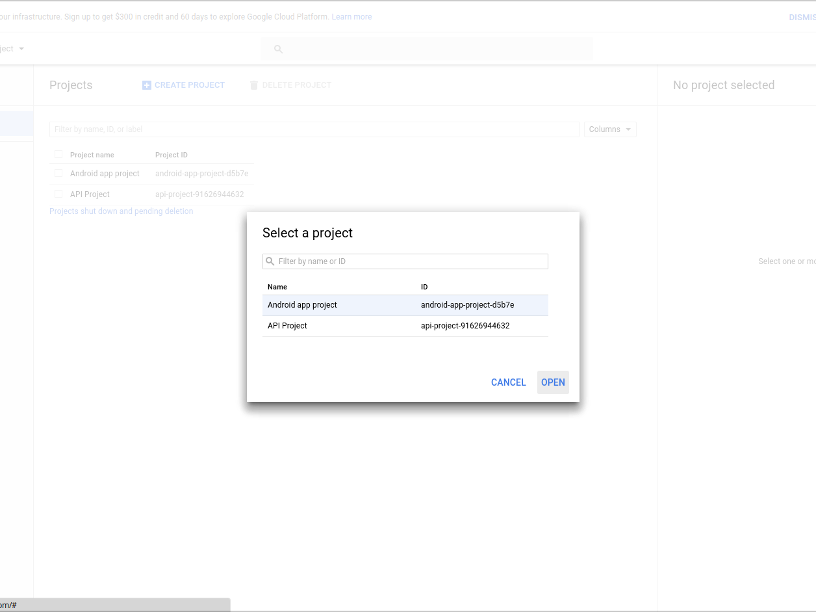
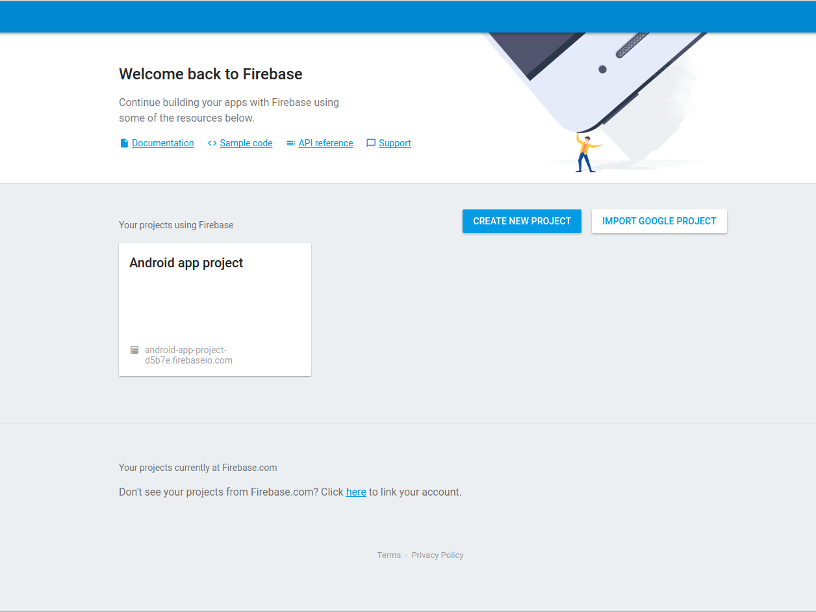
2.Choose the Project name you have created earlier
in Firebase for your push notifications.
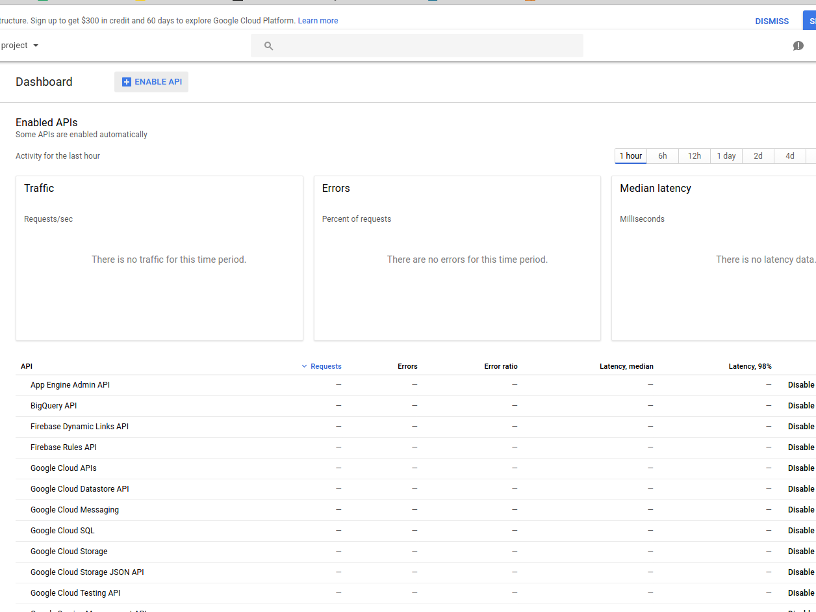
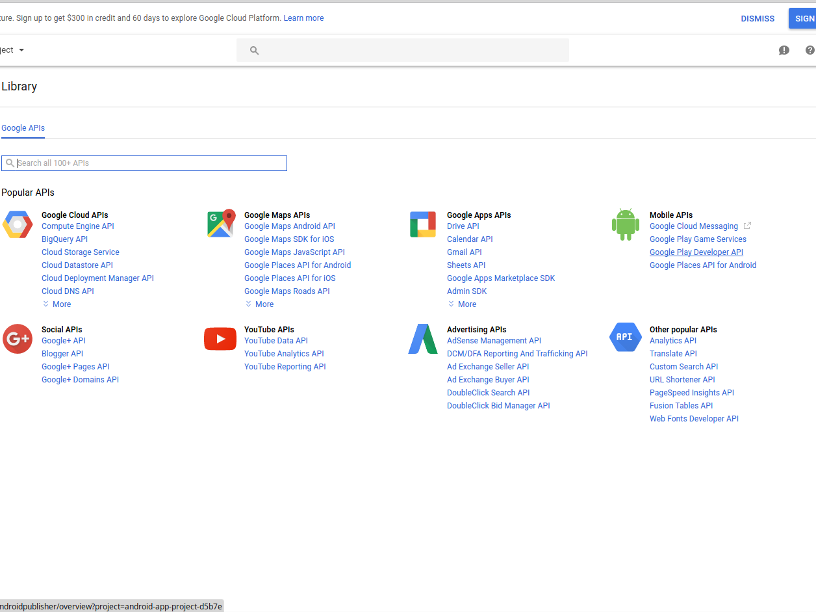
3. Click on the Enable API button
4. Select Google Play Developer API in the Mobile APIs section
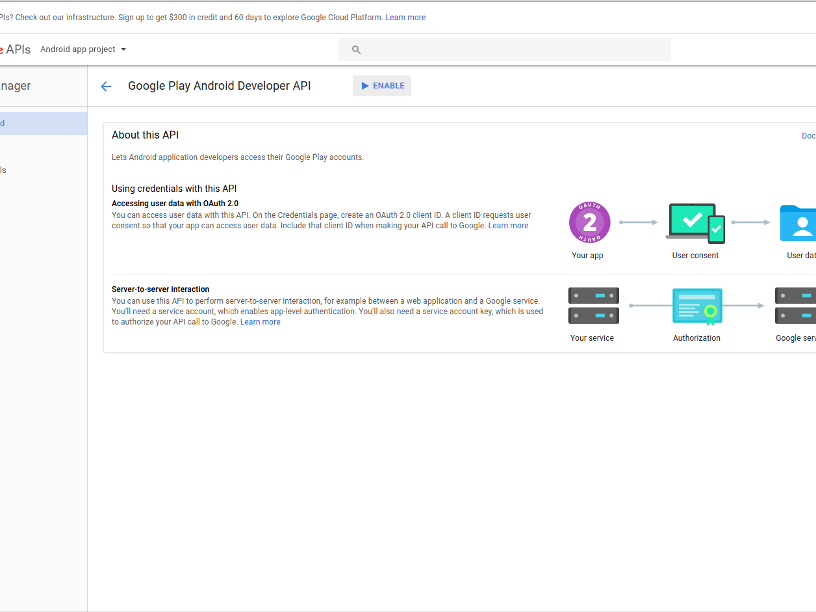
5. Click Enable button
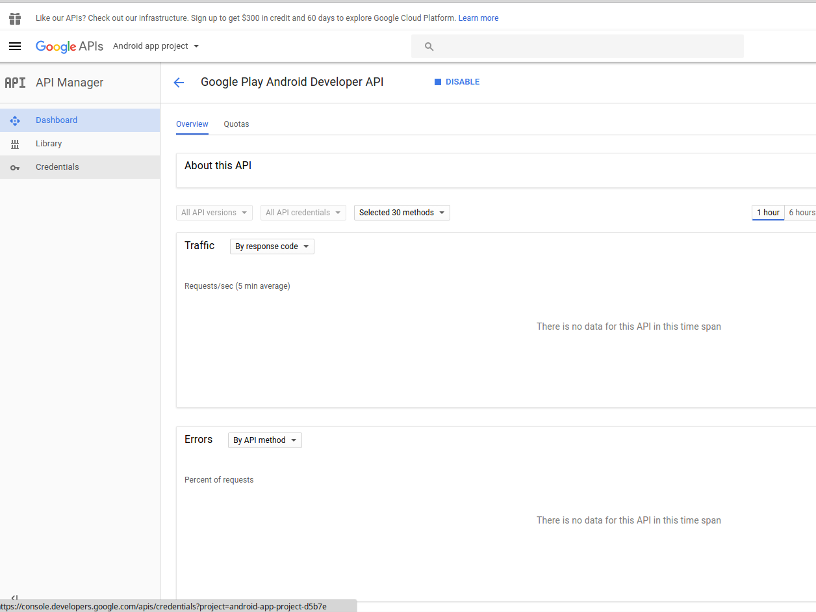
6. Select Credentials menu item in the left side menu
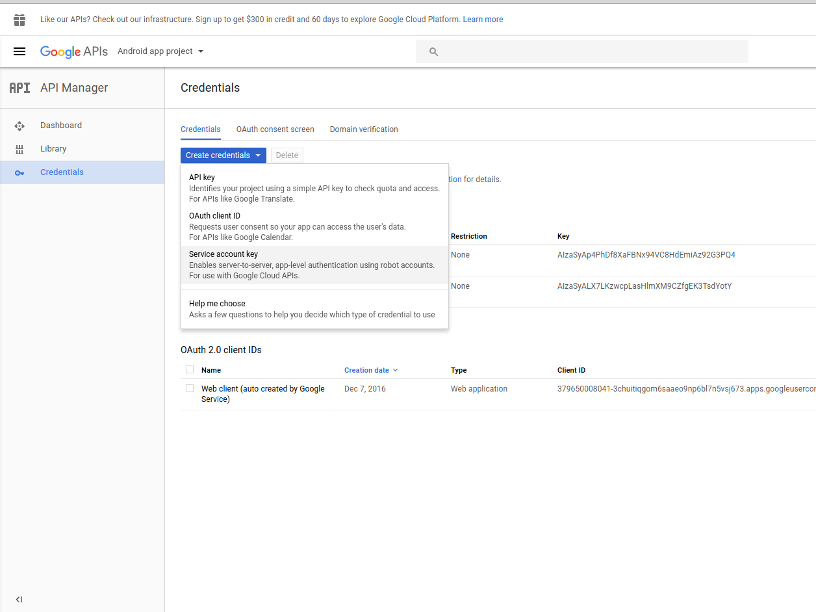
7. Click the Create credentials button and choose Service account key in the drop down menu
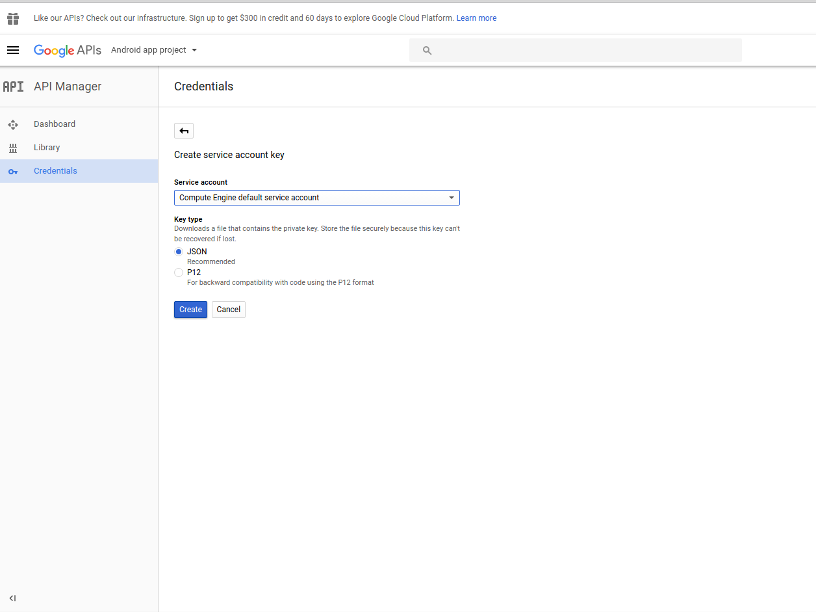
8. Select Compute Engine default service account in the Service account drop down menu and click Create button
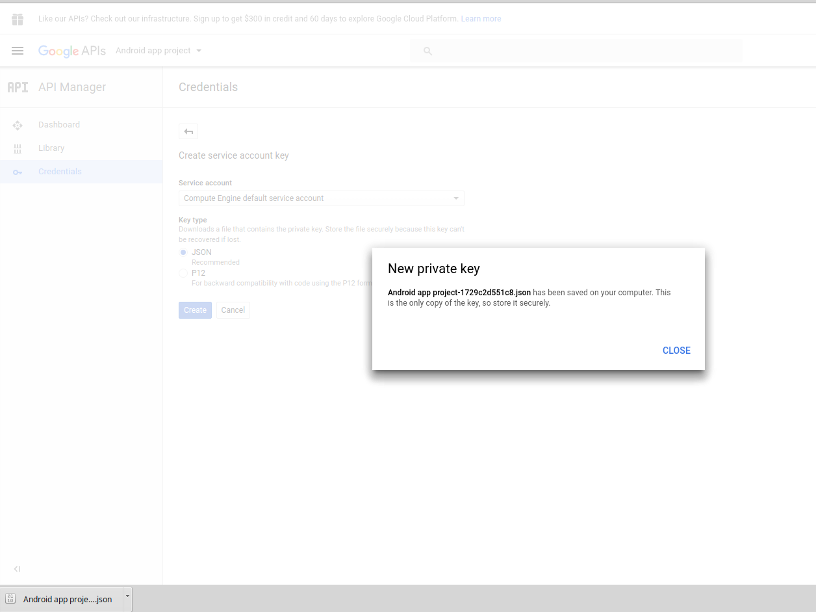
9. As soon as you click Create button, json file will be downloaded. Remember it's location, you will need this file later.
Enabling the Billing feature
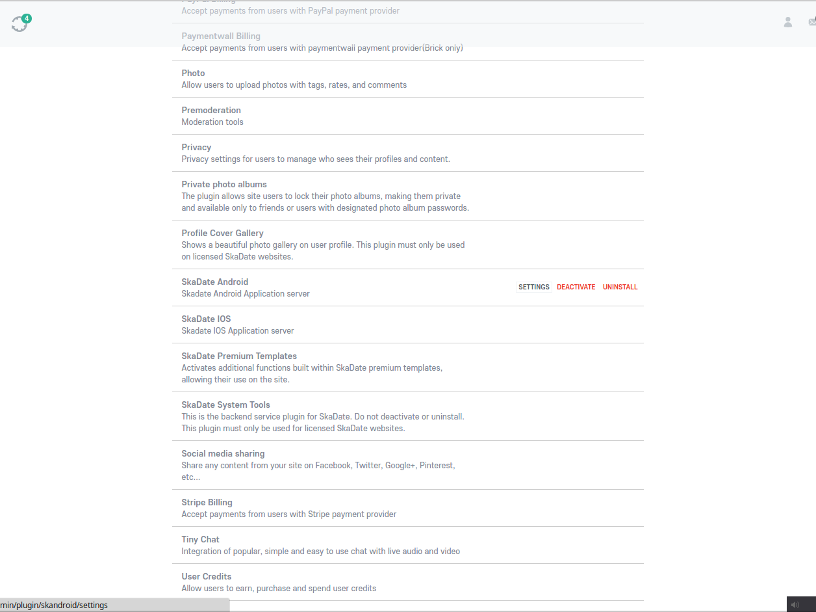
10. Go to the Settings page of Skadate Android plugin
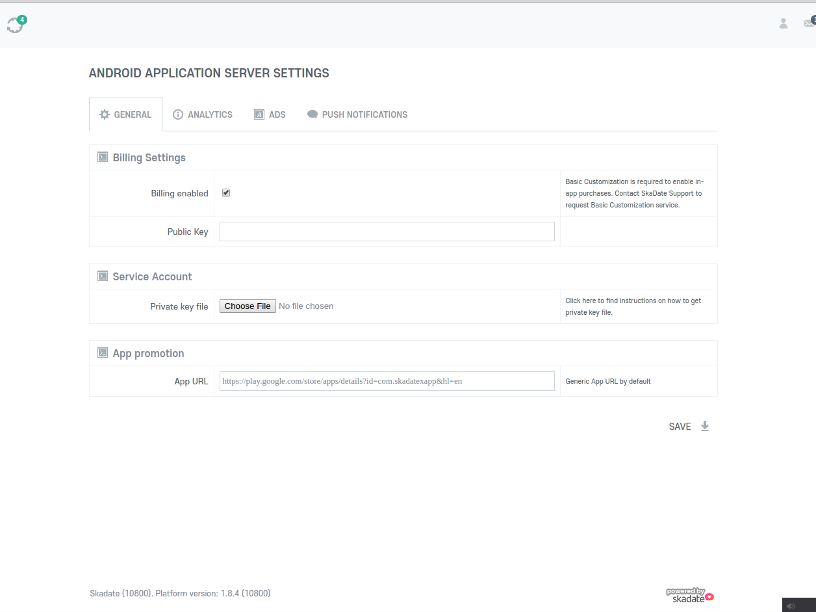
11. Select checkbox Billing enabled
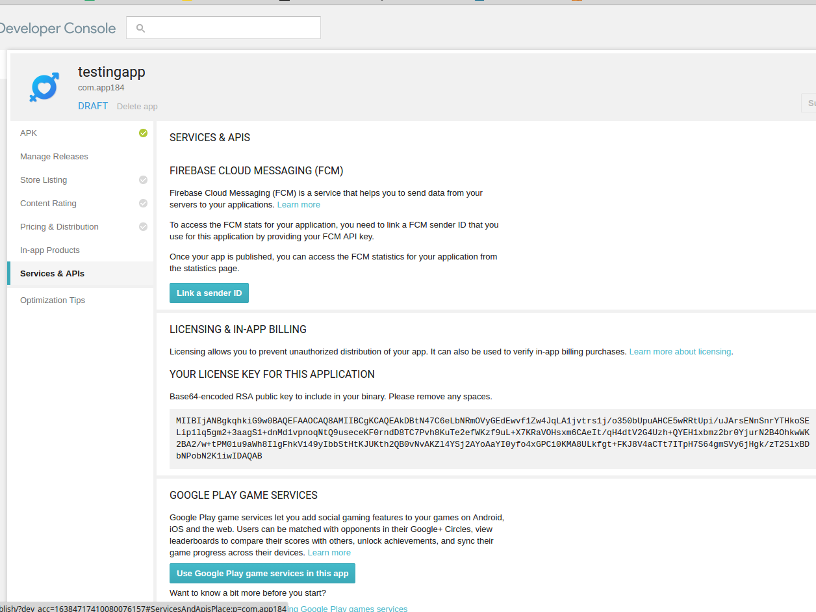
12. Login to your Google Developer Console: https://play.google.com/apps/publish/ and select the app you need to configure in-app products for. Click the Services & APIs tab in the sidebar and copy the license key value (Base64-encoded RSA public key)1)
13. Enter copied public key in the Public key field and upload .json file which you have downloaded earlier for the Private key file.
Linking project in Google Play
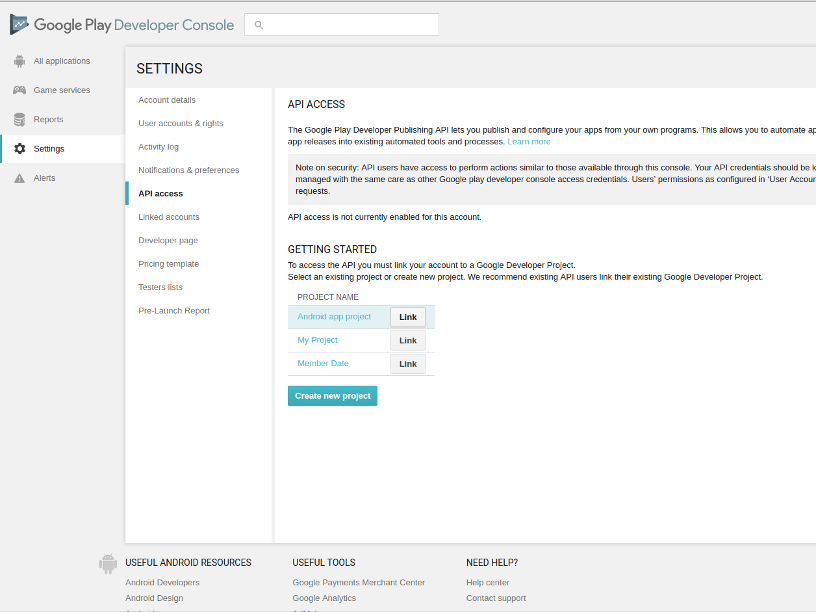
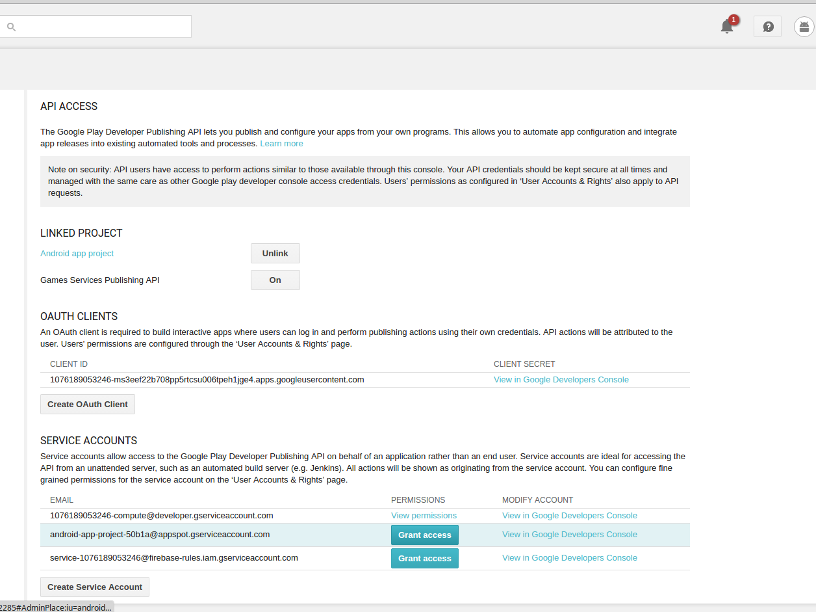
14. Go to the Settings → API access section in the left menu. Click the Link button next to the project your created in the Firebase.
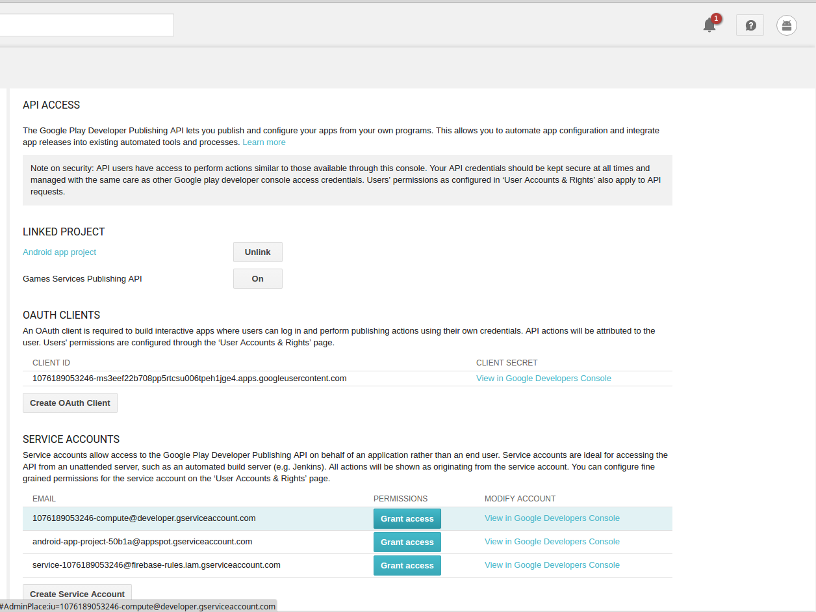
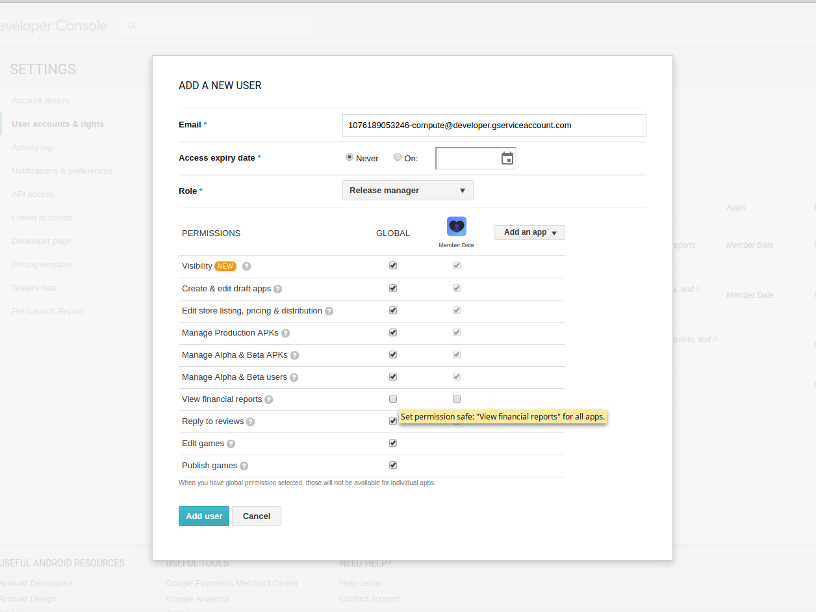
15. Click Grant access button
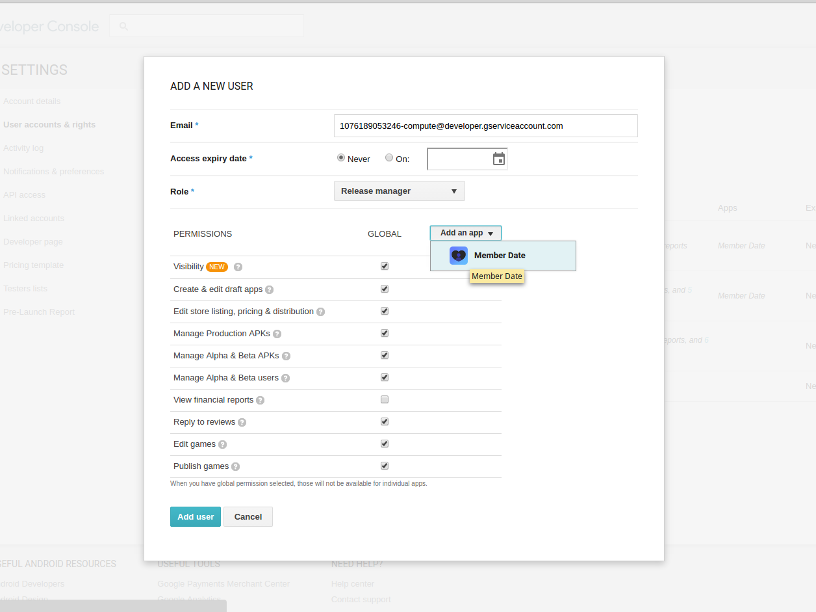
16. Click Add an app and select your app for which you want to configure in-app products
17. Check View financial reports checkbox and click Add User button
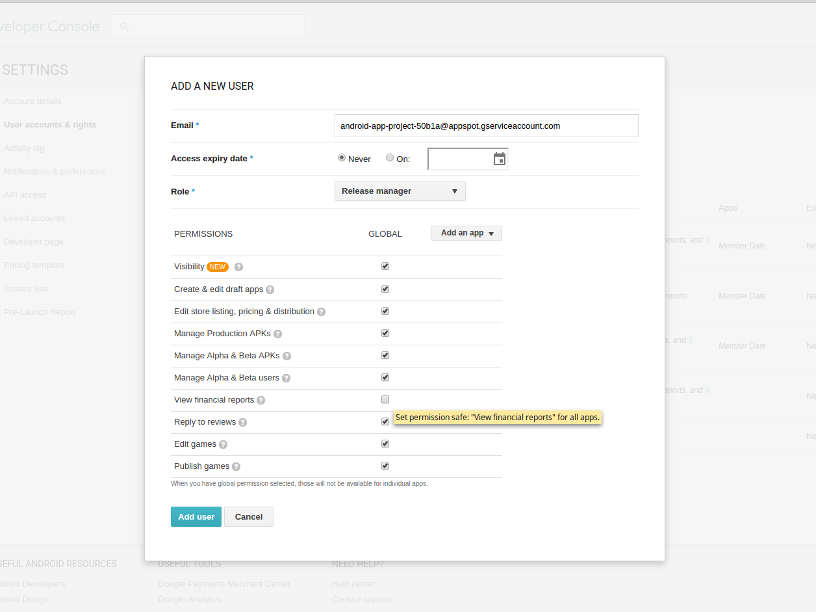
18. Go to the Settings → API access section in the left menu and click Grant access for second account
19. Check View financial reports and click Add user button
Your Android app Billing Settings are set.
Creating In-app Products
1. Login to your Google Developer Console https://play.google.com/apps/publish/
2. Select app you need to configure in-app purchase for
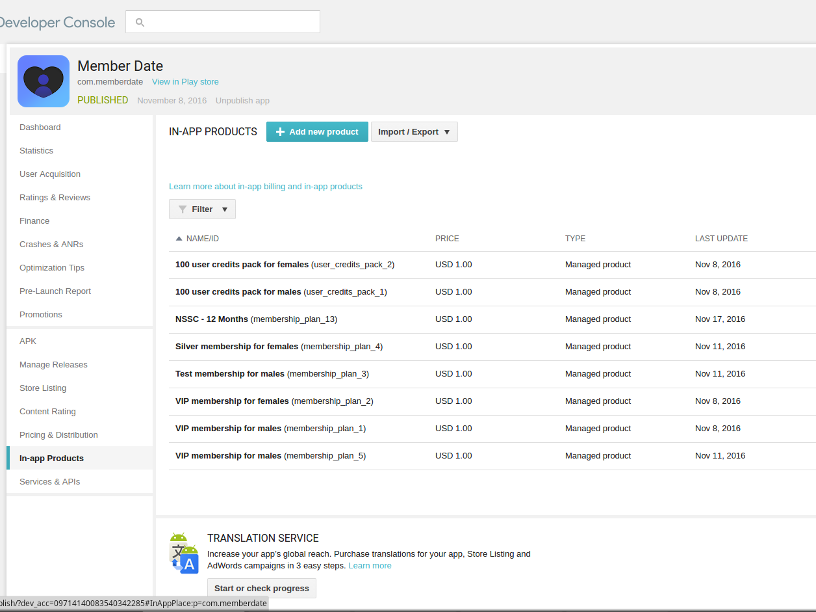
3. Select the In-app Products menu item in the left-side menu
4. Click the Add new product button
To get the products' IDs - follow these steps:
Paid Membership plugin:
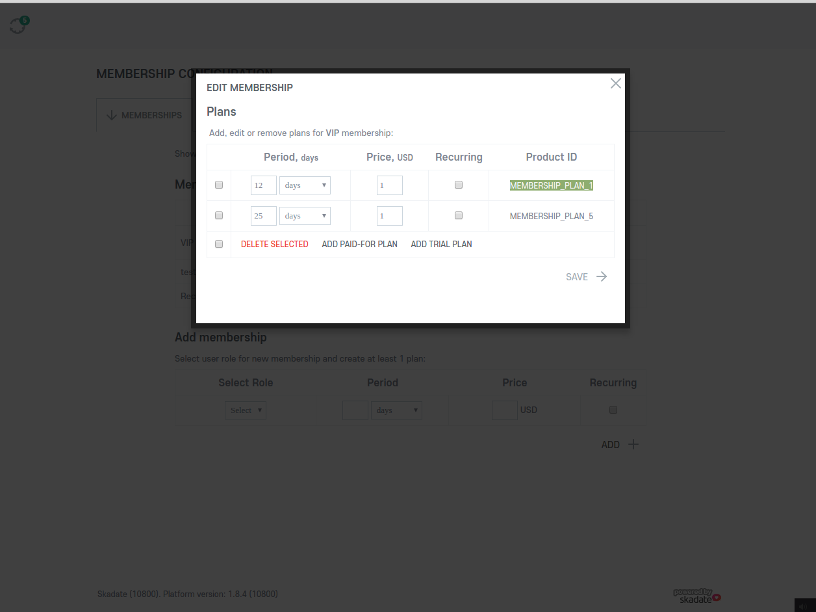
- Go to Admin Area > Plugins > Installed Plugins > Paid Memberships » Settings
- Click the Edit button next to the membership you need to configure in-app products for
- Copy the Product ID from the appeared window
| Note: You need to transform the text from upper to lower case. For example: the MEMBERSHIP_PLAN_7 product ID should be used as membership_plan_7. |
User Credits
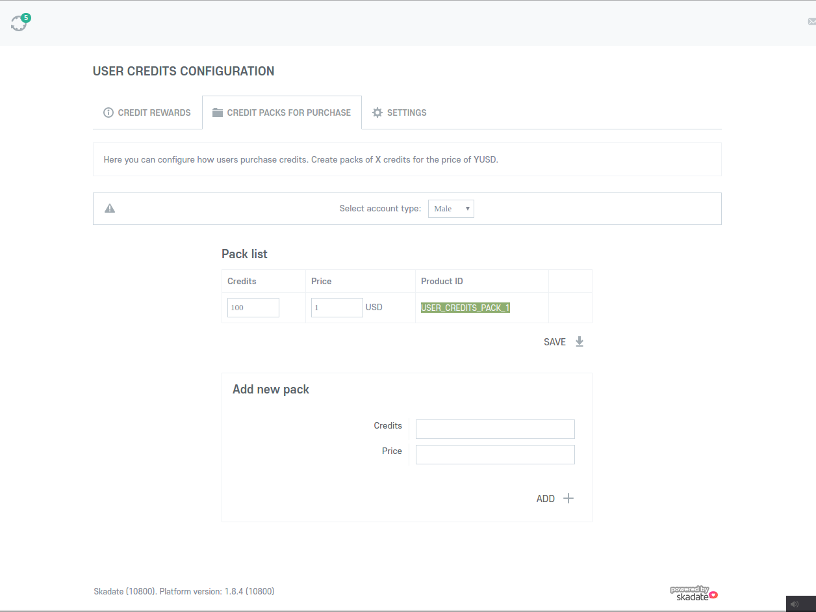
- Go to Admin Area > Plugins > Installed Plugins > Paid Memberships » Settings »> Credit packs for purchase tab.
- Copy the Product ID from the Pack List.
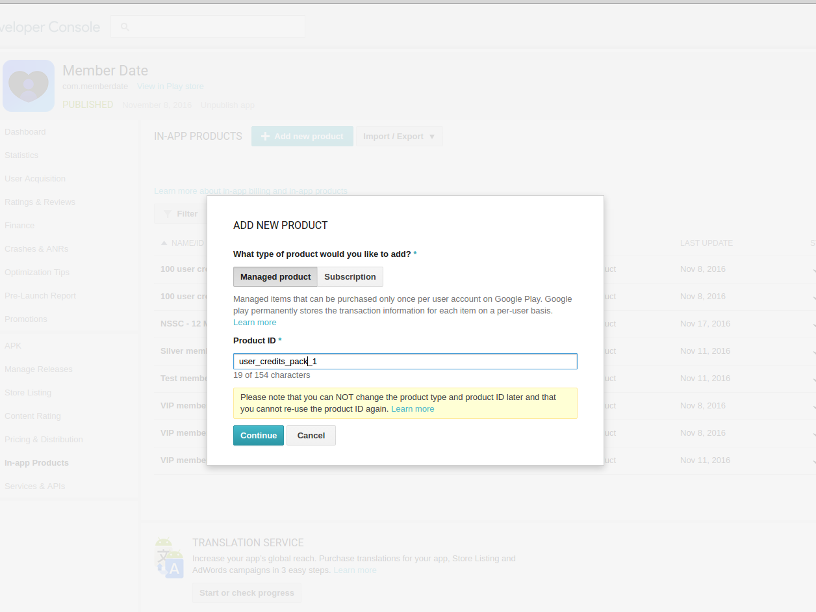
6. Fill in the form:
- What type of product would you like to add? - select Managed Product 2)
- Product ID - enter Product ID of membership plan or credit pack3)
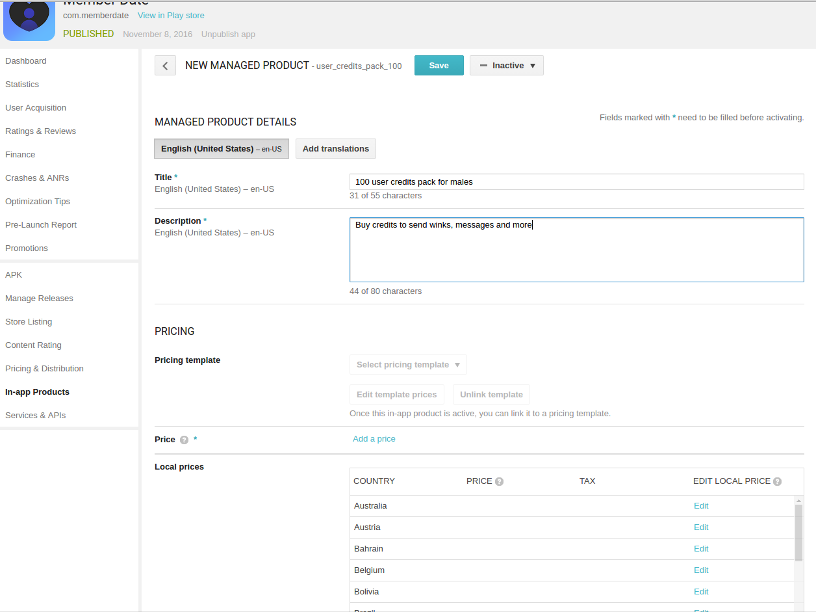
Click the Continue button. You will be directed to the Managed Product Details page
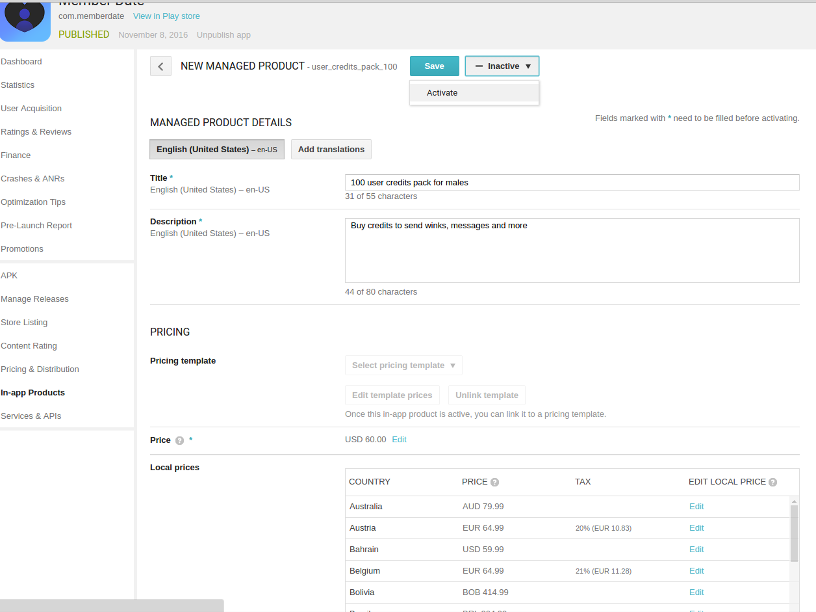
- Enter Title - for ex: 100 user credits pack for males or VIP membership plan for males
- Enter Description - for ex: Buy credits to send winks, messages and more
- Click Add price link
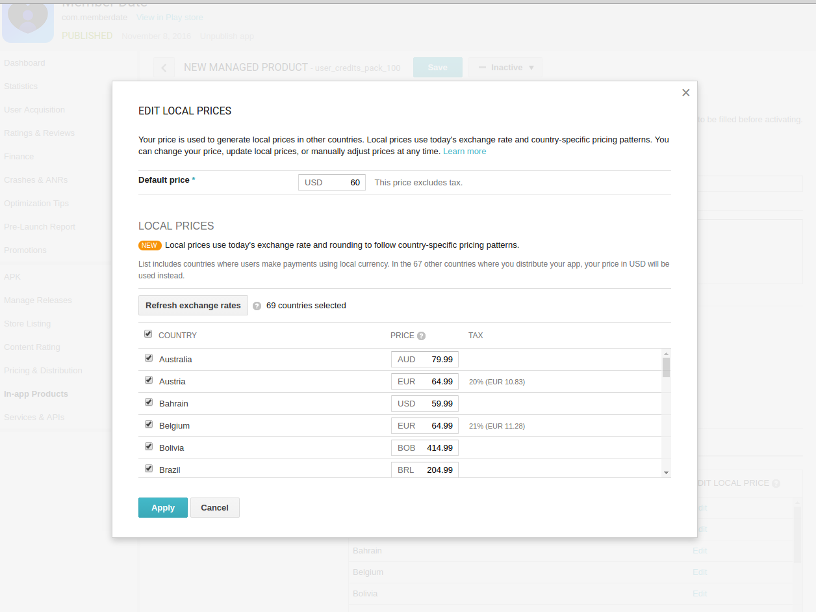
- Enter your default price, select Country checkbox and click Apply button
- Click Activate, settings will be automatically saved.
Now you need to wait for the product activation up-to 24 hours. After the product becomes active - it will appear on your app.
Testing In-app Billing
You need to:
1. Add test Google Account on your mobile phone
2. Add your credits card to the test Google Account
3. Create Google Group and add your test Google Account to it
4. Upload APK file as alpha or beta version
5. Click the Manage list of testers link after the APK file will be uploaded
6. Find the “Add Google Groups or Google+ Communities” field in the appeared form.
7. Enter Google Group Email and click Add
For example: [email protected]
Please follow this guide for more information: http://developer.android.com/google/play/billing/billing_testing.html
